
 Nick Ross
8 min read
How to Use Exact Data Match (EDM) to Eliminate DLP False Positives in Microsoft 365
If you’ve ever set up a DLP policy in Microsoft 365, you’ve probably experienced the false positive problem. You create a rule to catch...
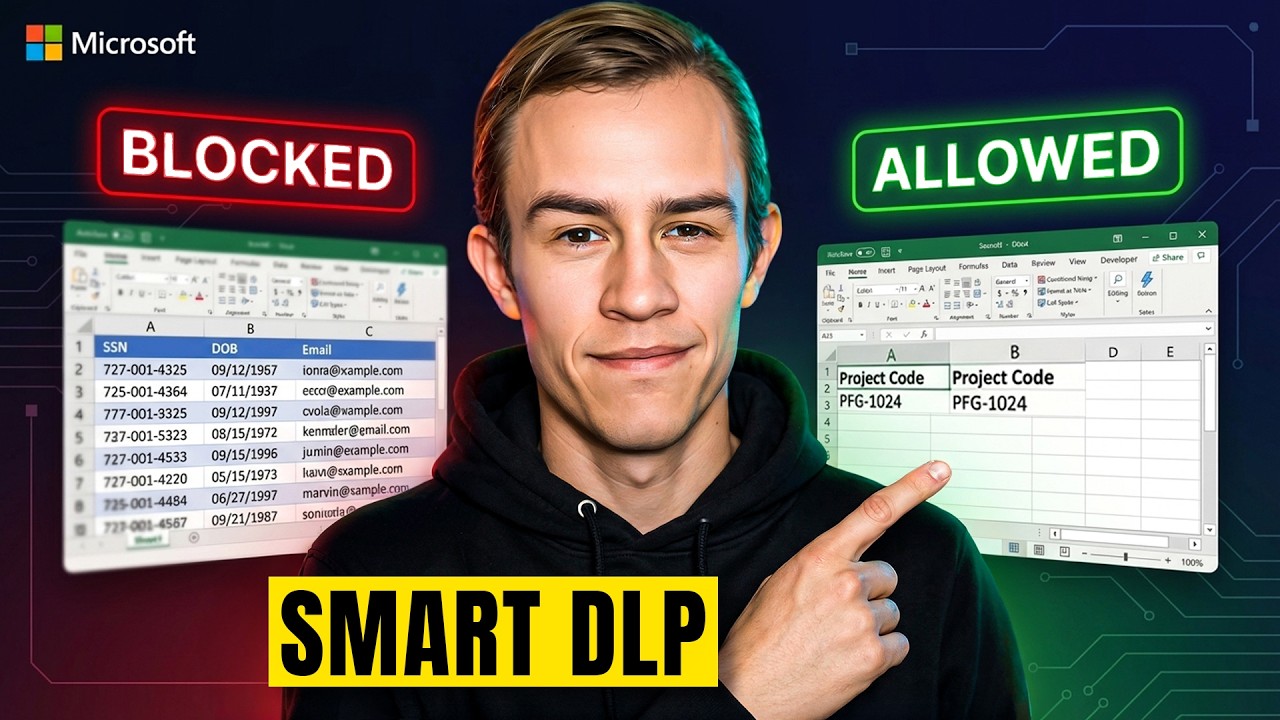
If you’ve ever set up a DLP policy in Microsoft 365, you’ve probably experienced the false positive problem. You create a rule to catch Social Security numbers, and suddenly it’s flagging phone numbers, project codes, and invoice numbers.
Users start overriding policies. Admins start ignoring alerts. The whole thing falls apart.
Exact Data Match fixes this. Here’s how to set it up.
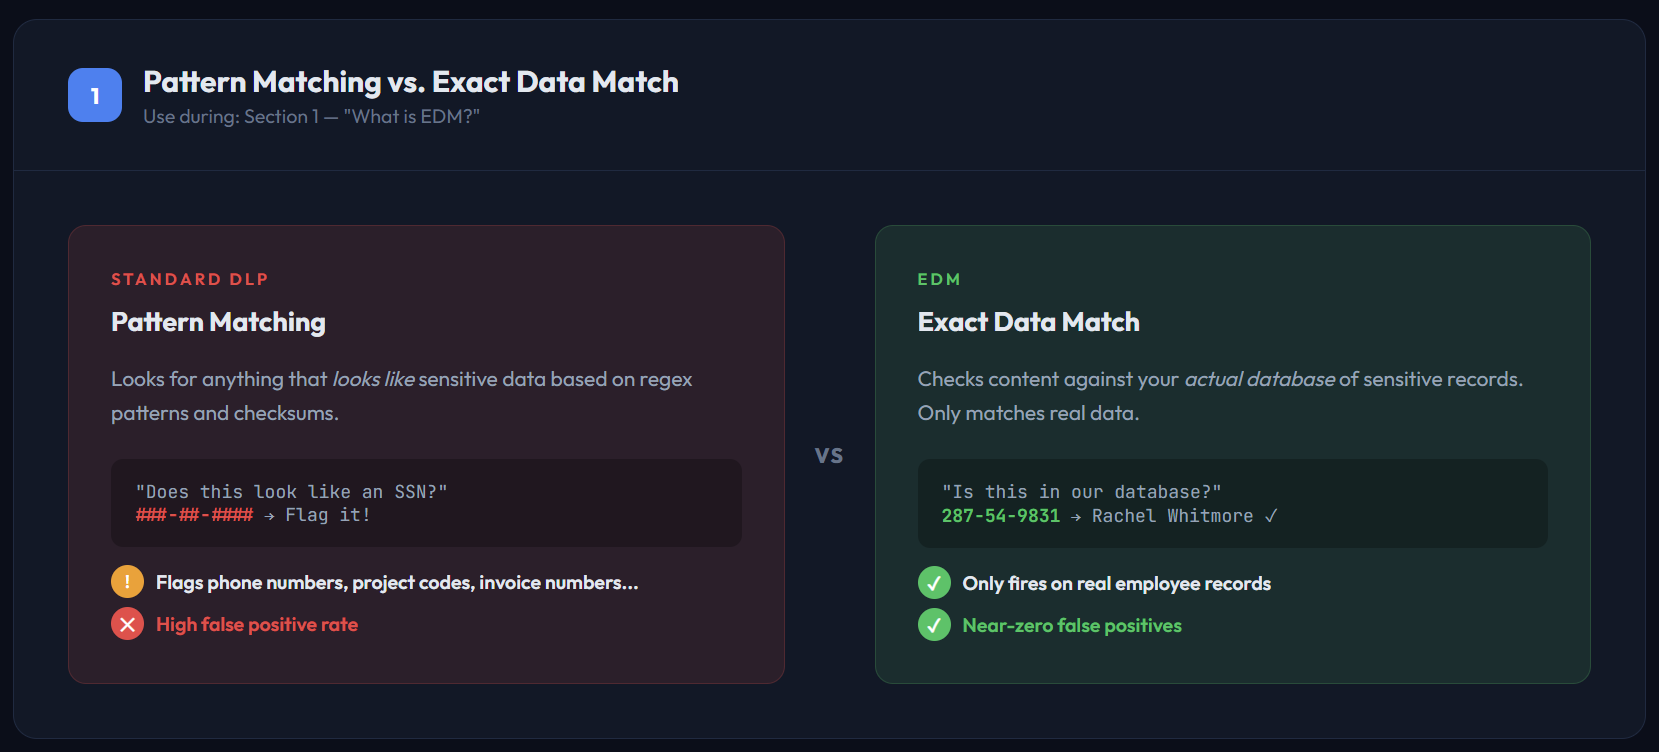
Standard DLP policies use pattern matching. Microsoft defines what a Social Security number looks like: three digits, dash, two digits, dash, four digits and scans everything for that pattern. The issue is that plenty of non-sensitive data matches the same pattern.
EDM takes a completely different approach. Instead of scanning for patterns, you upload a hashed copy of your actual sensitive database: employee records, customer data, whatever you need to protect. DLP then checks content against that real data. If it finds an actual record from your database, it blocks it. If the content just happens to contain a similar-looking string, it lets it through.
The result: an HR onboarding packet with a real employee’s SSN gets blocked. A budget spreadsheet that uses the same employee ID format as a project code goes right through. No false positive.
Before you start, you’ll need:
Microsoft 365 E5 or a Purview Suite add-on (can bolt onto Business Premium)
Compliance Admin or Global Admin permissions
Your sensitive data in a clean CSV file. No empty cells, no duplicate rows
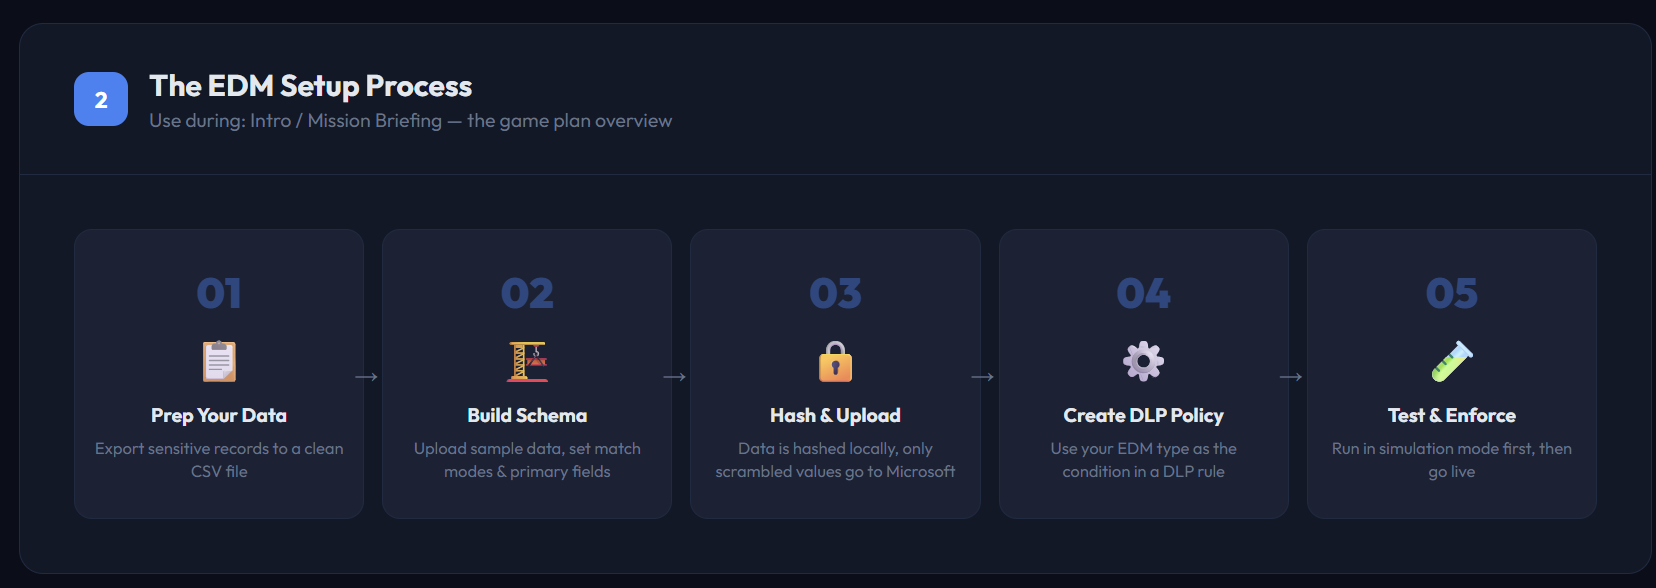
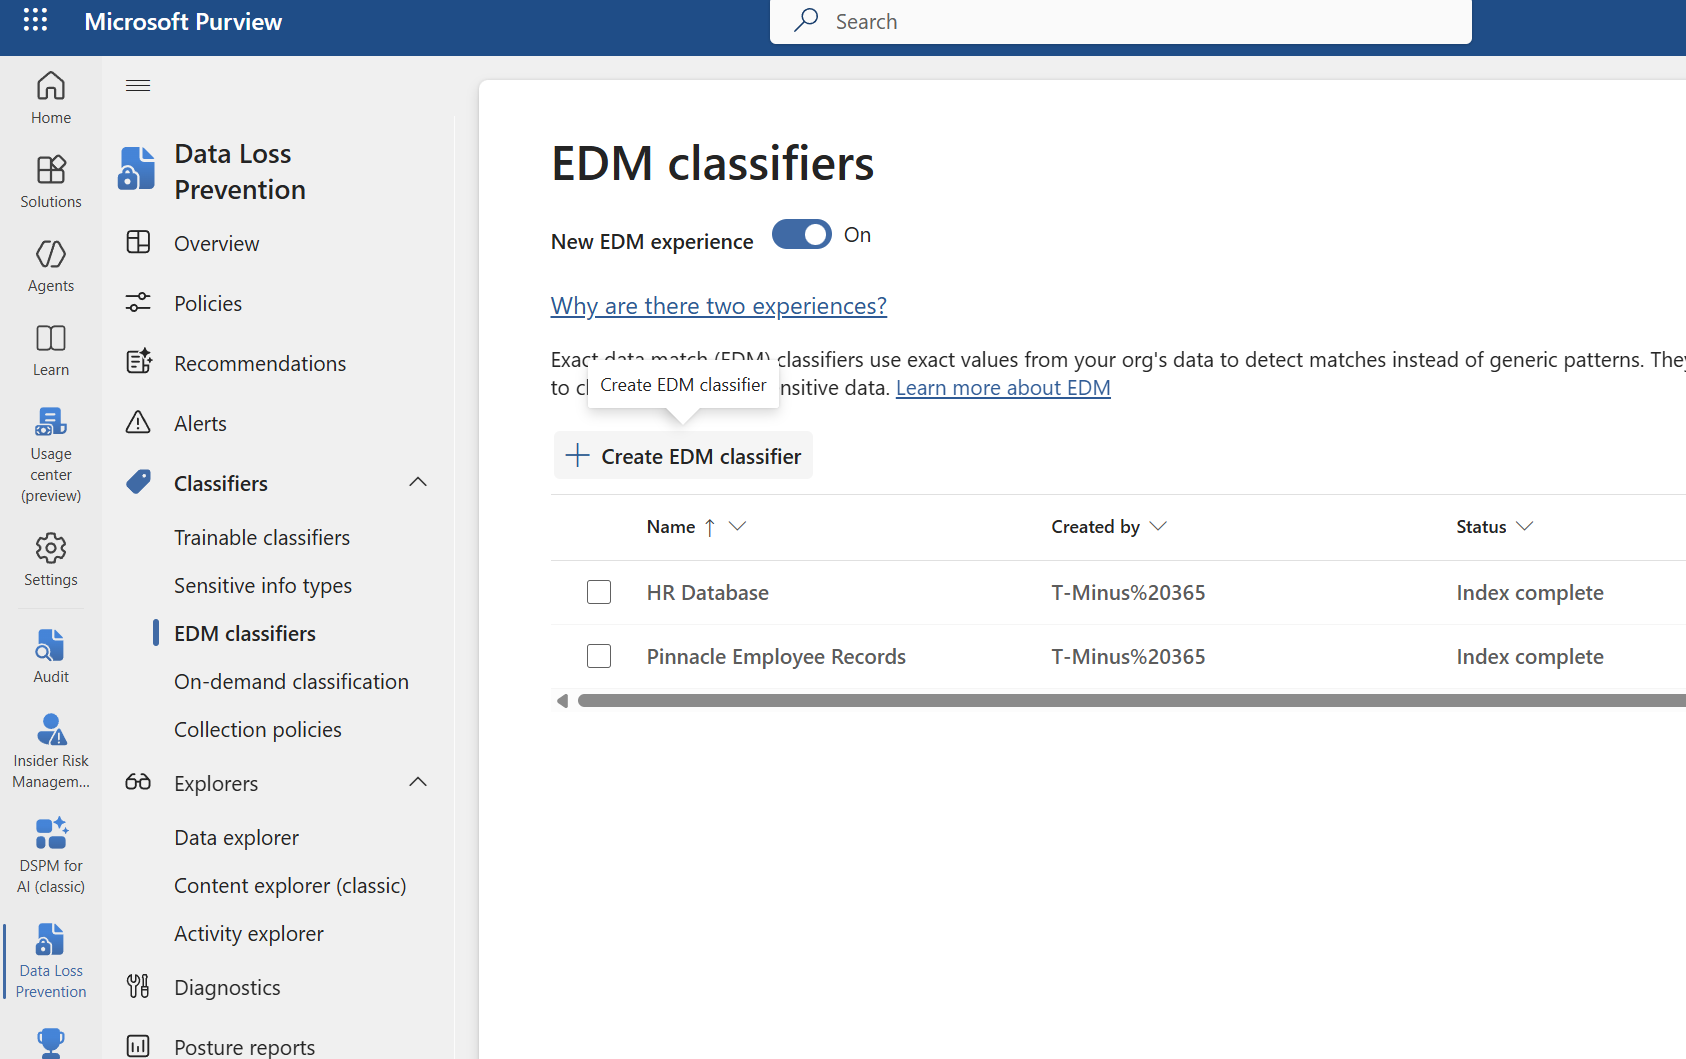
Go to purview.microsoft.com > Solutions > Information Protection > Classifiers > EDM classifiers and click Create EDM classifier
https://learn.microsoft.com/en-us/purview/sit-create-edm-sit-unified-ux-workflow
Give it a name and upload a sample data file. Use fake data in the same format as your real data. The sample file gets uploaded in plain text (it’s not hashed), so don’t use actual sensitive records here. The system reads your column headers and builds the schema automatically.
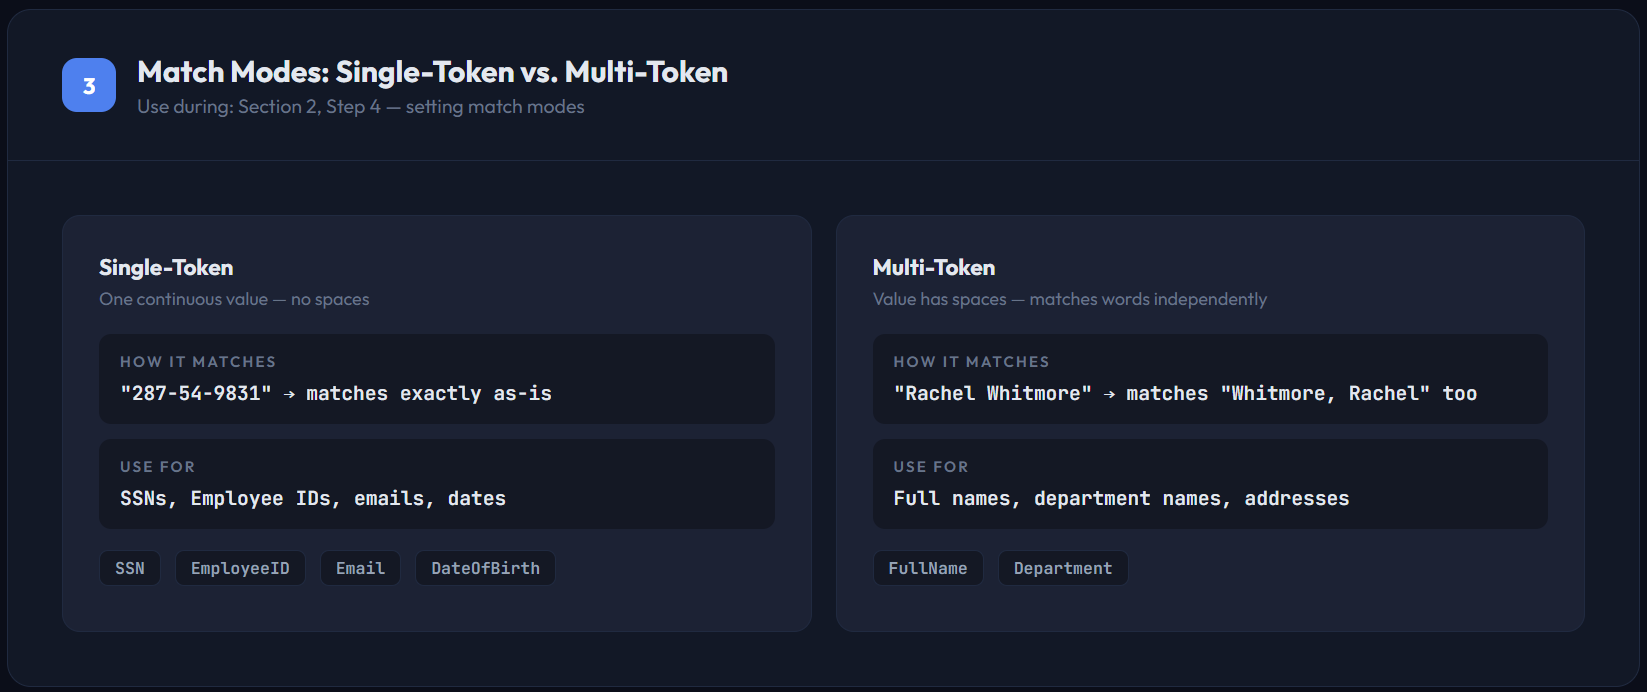
Each column gets a match mode setting:
Single-token — for values with no spaces (SSNs, employee IDs, emails, dates). EDM matches the exact string as one unit.
Multi-token — for values with spaces (full names, department names). EDM matches each word independently, so “Rachel Whitmore” also catches “Whitmore, Rachel.”
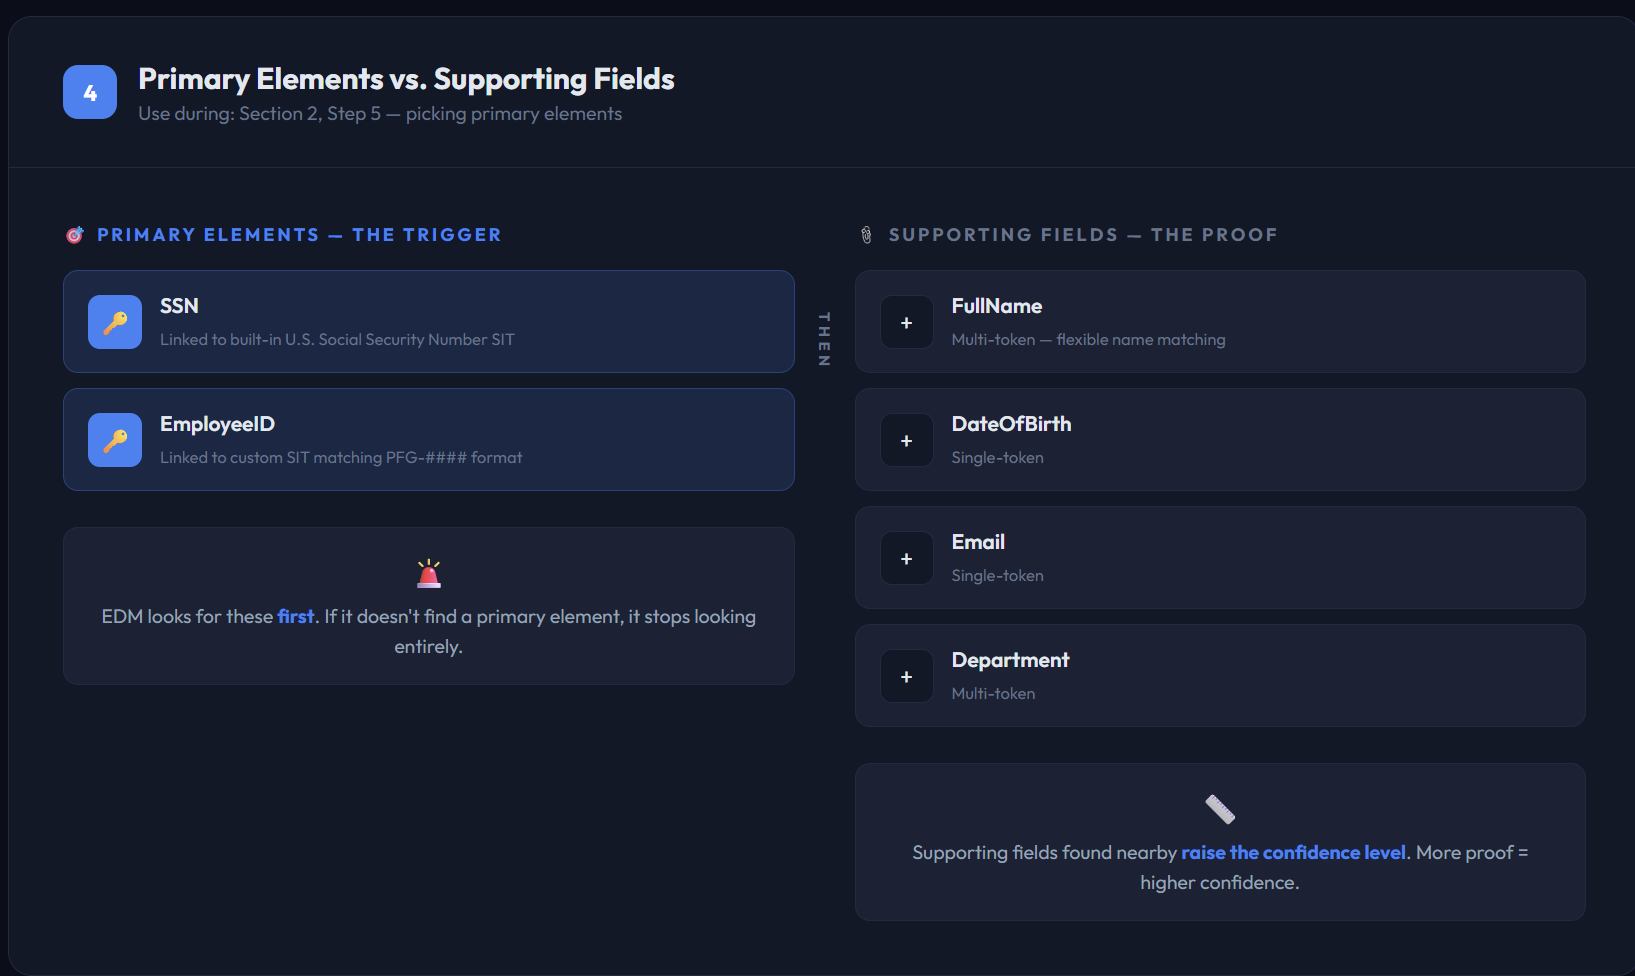
This is the most important decision. Primary elements are the fields EDM looks for first. If it doesn’t find one, it stops searching entirely. Choose fields that are both unique and likely to appear in any document containing sensitive data.
Good primary element choices: SSN (link it to the built-in U.S. Social Security Number SIT) and Employee ID (link it to a custom SIT matching your ID format).
Everything else, names, dates, emails, departments, becomes supporting fields that raise the confidence level when found near a primary element. Primary elements are the trigger. Supporting fields are the proof.
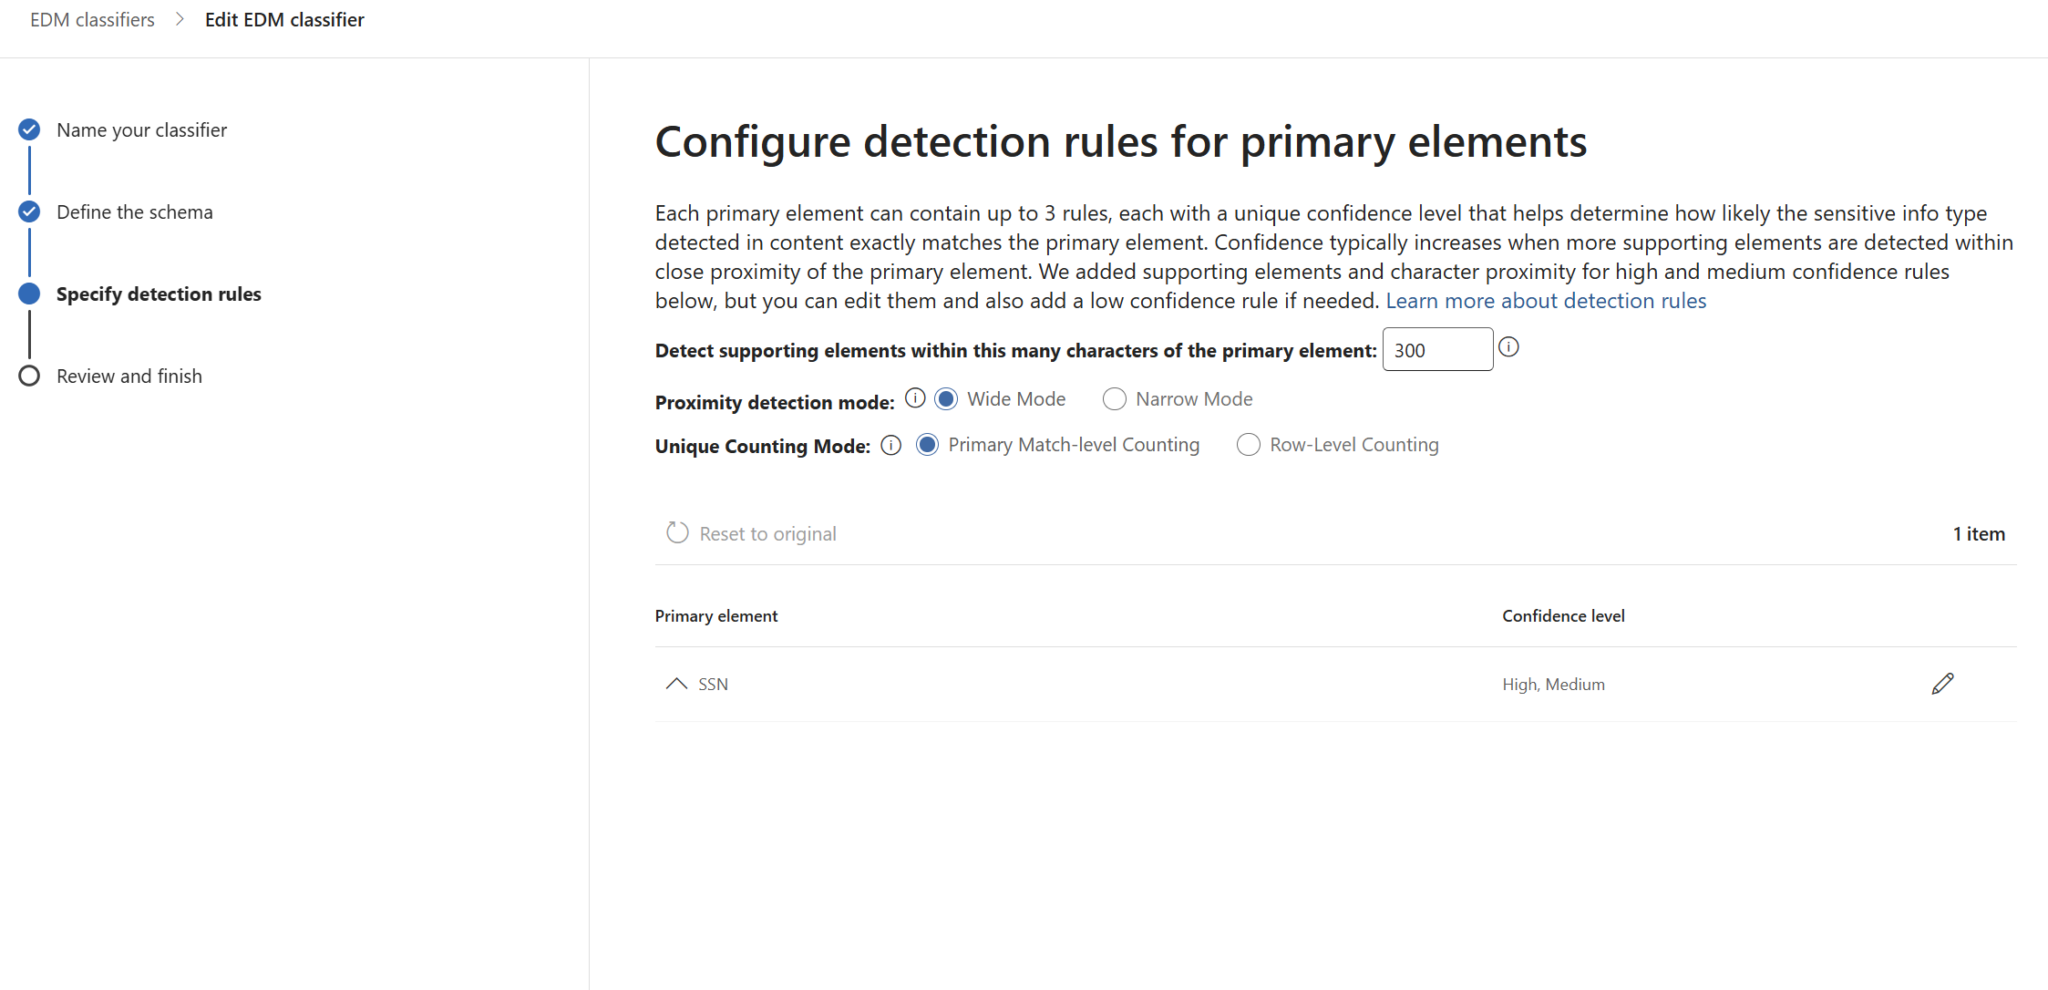
EDM uses confidence tiers based on how many supporting fields appear near the primary element:
High confidence — Primary field + 2 or more supporting fields within 300 characters
Medium confidence — Primary field + 1 supporting field
Low confidence — Primary field alone (disabled by default)
More required supporting evidence means fewer false positives but a higher chance of missing real matches. The defaults are solid for most environments.
This is where people worry about sending sensitive data to Microsoft. Don’t. Your data gets hashed locally on your machine before anything is uploaded.
Microsoft only sees scrambled, one-way cryptographic hashes. They can’t reverse it. https://learn.microsoft.com/en-us/purview/sit-get-started-exact-data-match-hash-upload?tabs=two-computers
Create an EDM_DataUploaders security group in Entra ID and add your admin account. Skip this and the upload agent won’t authorize.
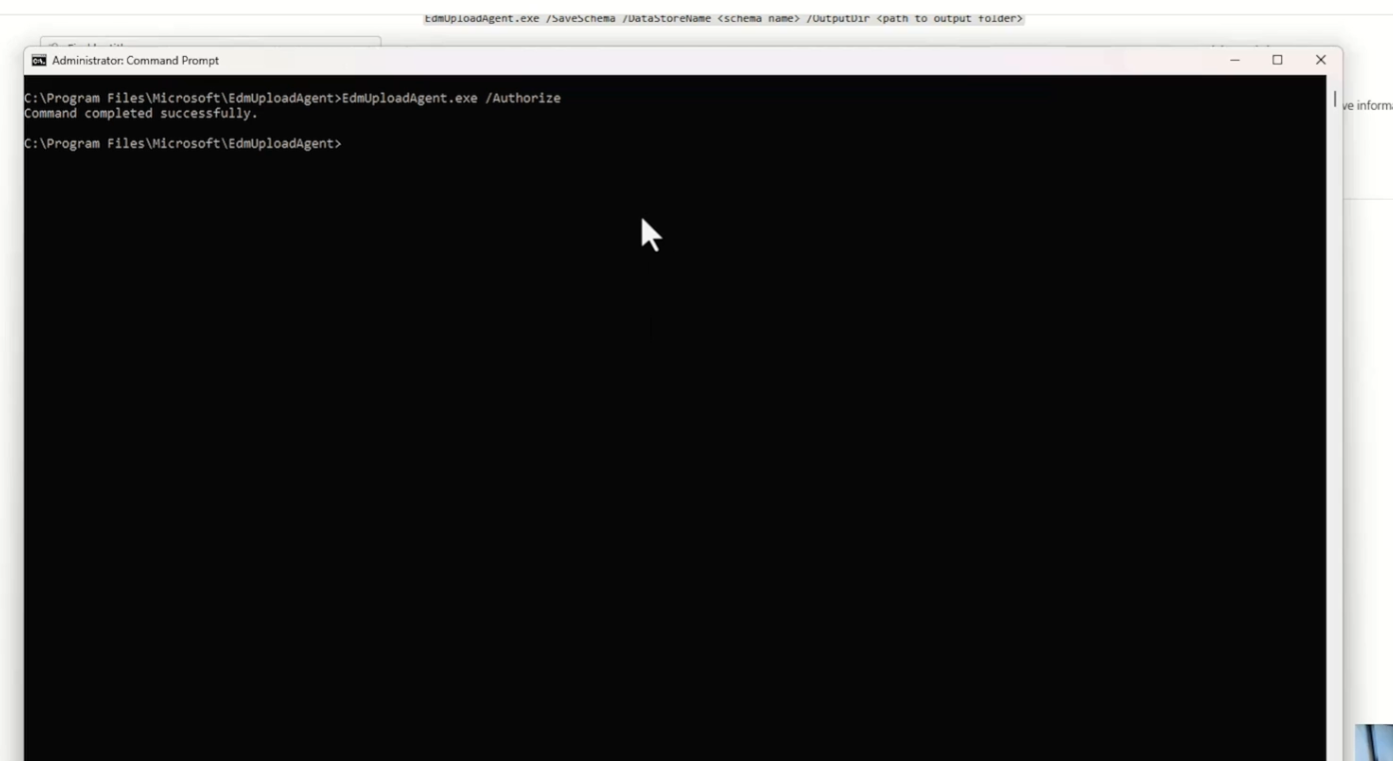
Install the EDM Upload Agent from Microsoft.
Authorize by running EdmUploadAgent.exe /Authorize and signing in.
Download your schema (wait at least one hour after creating it in Purview — the system needs time to sync):
EdmUploadAgent.exe /SaveSchema /DataStoreName "YourSchemaName" /OutputDir "C:\EDMData"
Validate your data file:
EdmUploadAgent.exe /ValidateData /DataFile "C:\EDMData\employees.csv" /Schema "C:\EDMData\YourSchema.xml"
Hash and upload:
EdmUploadAgent.exe /UploadData /DataStoreName "YourSchemaName" /DataFile "C:\EDMData\employees.csv" /HashLocation "C:\EDMData\Hashed" /Schema "C:\EDMData\YourSchema.xml"
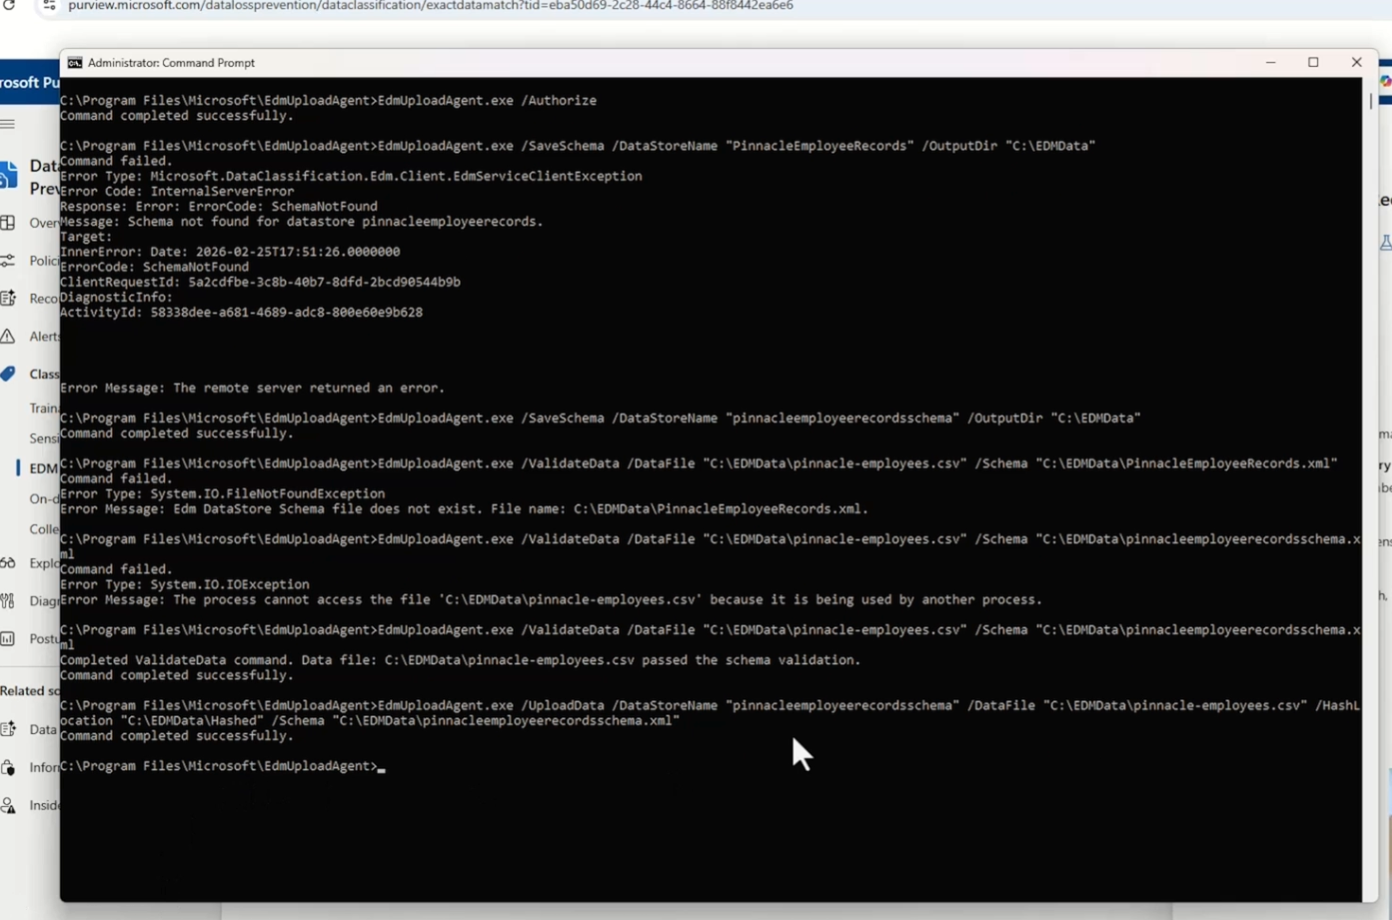
Check Purview for an Index complete status and you’re good. For production, schedule this as a recurring task so the database stays current.
If you get a schema validation error about maximumNumberOfTokens missing, it almost always means you didn’t wait long enough after creating the schema. The downloaded schema file is out of sync. Wait an hour, re-download with /SaveSchema, and try again. Also make sure you’re on the latest version of the upload agent, and never manually edit the XML schema file — the agent adds internal tags during download that will break if modified.
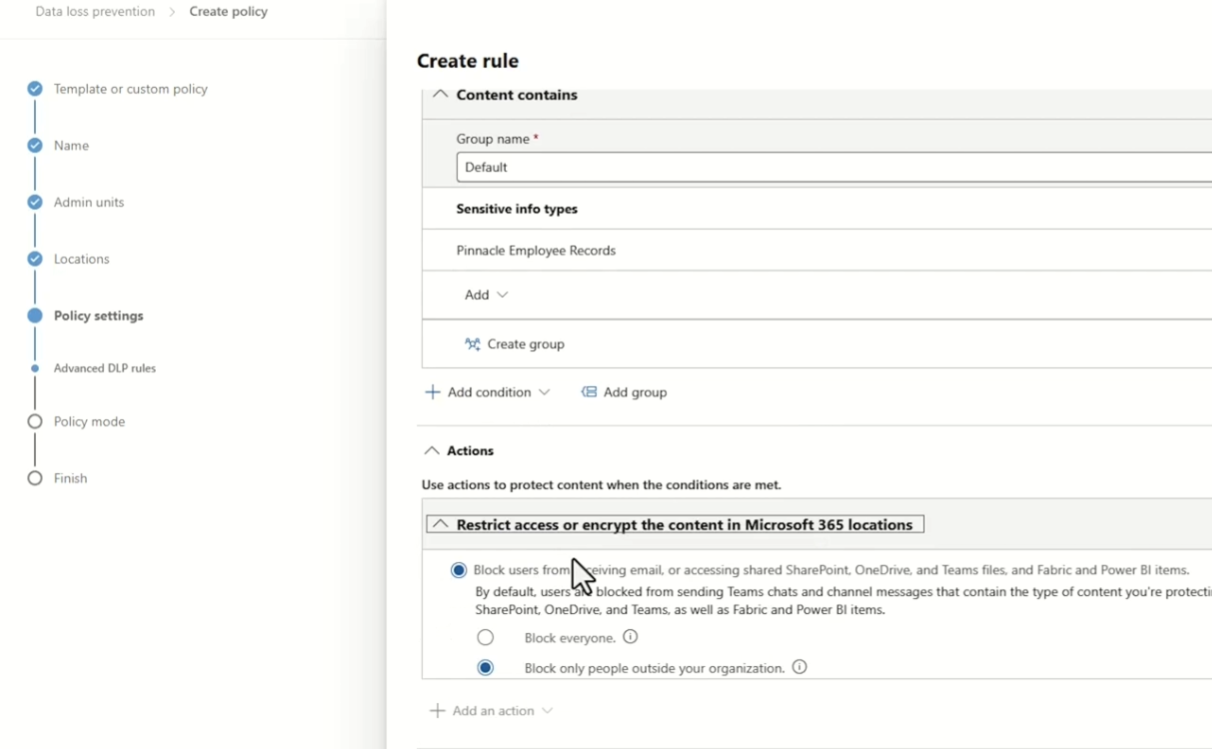
In Purview, go to Data Loss Prevention > Policies > Create Policy. Choose Custom > Custom policy.

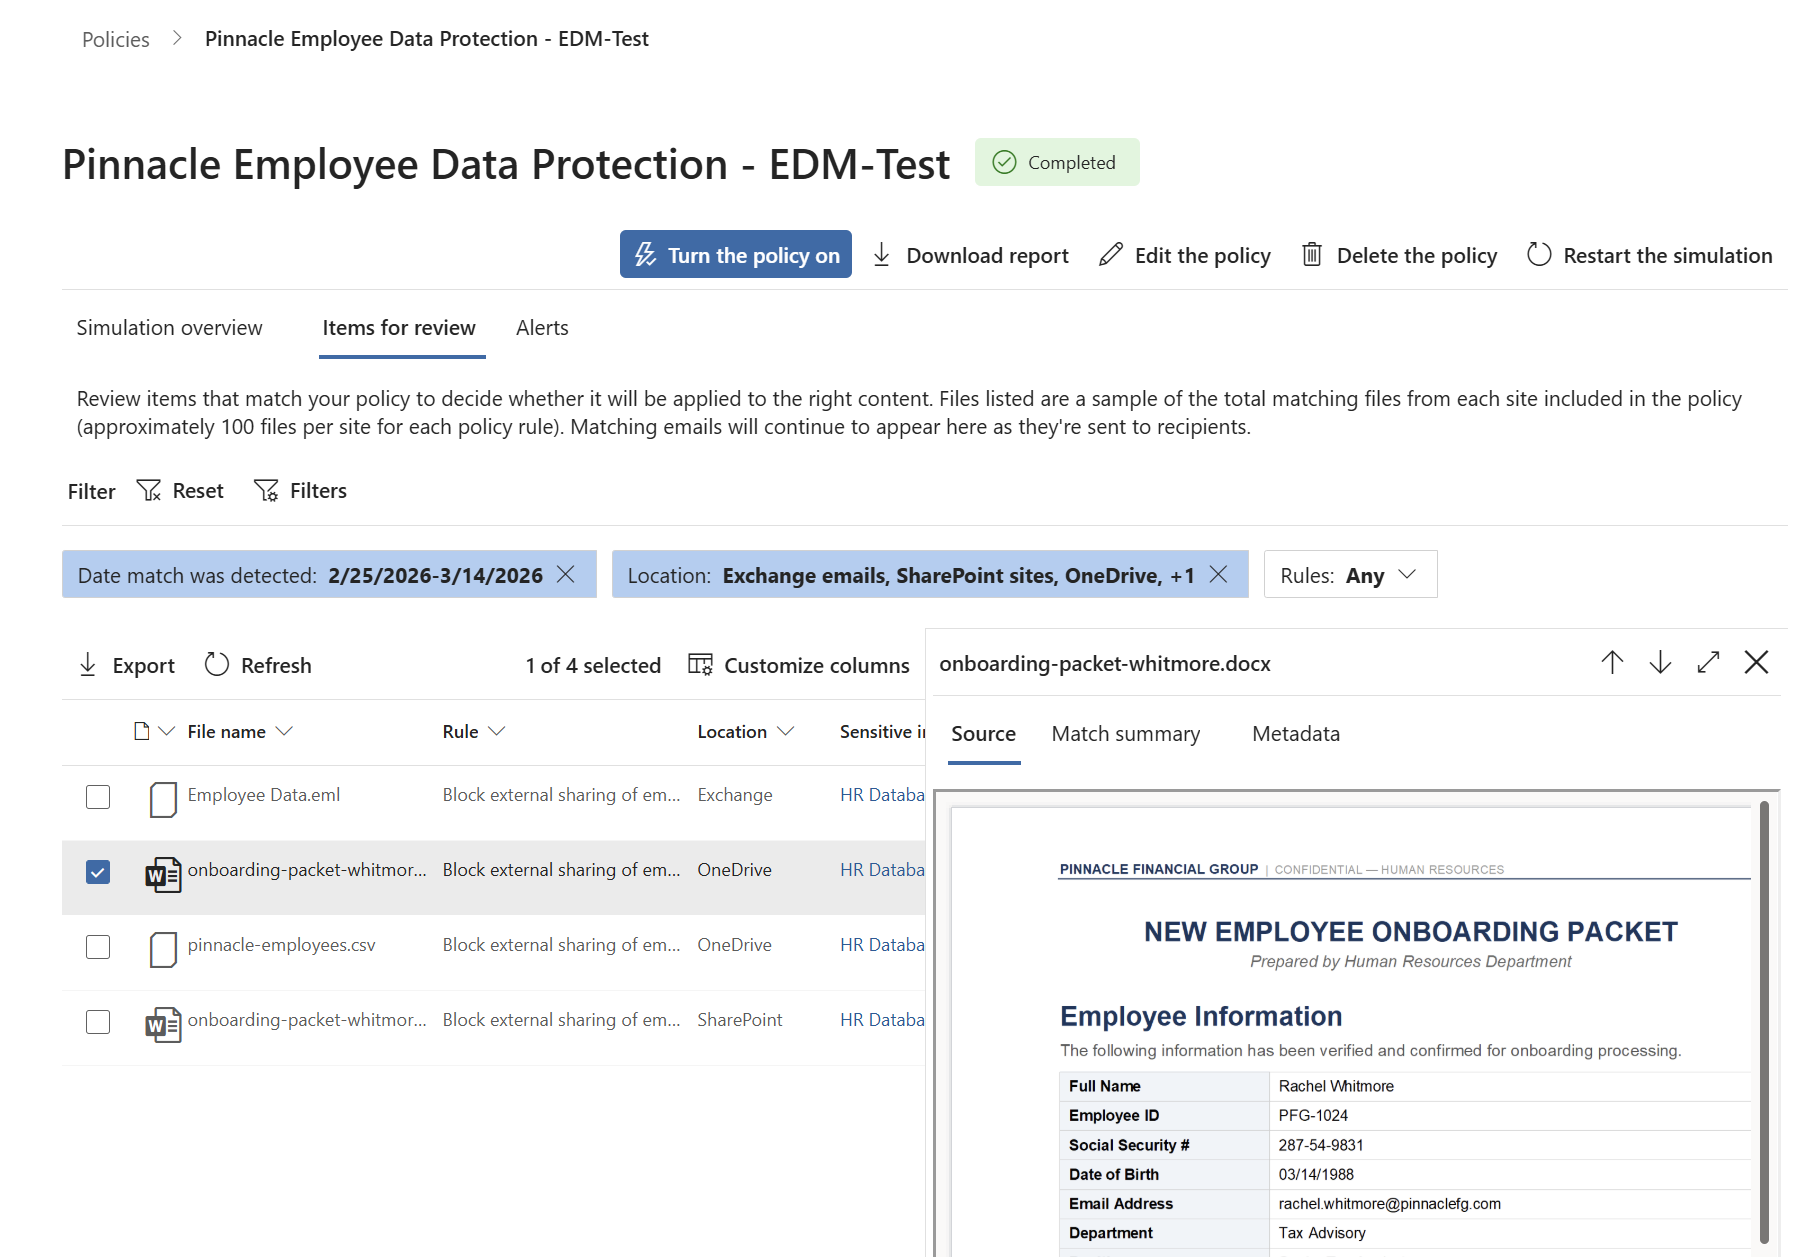
Apply it to Exchange email, SharePoint, OneDrive, and Teams. Create a rule with the condition Content contains your EDM sensitive info type at High confidence with an instance count of 1.
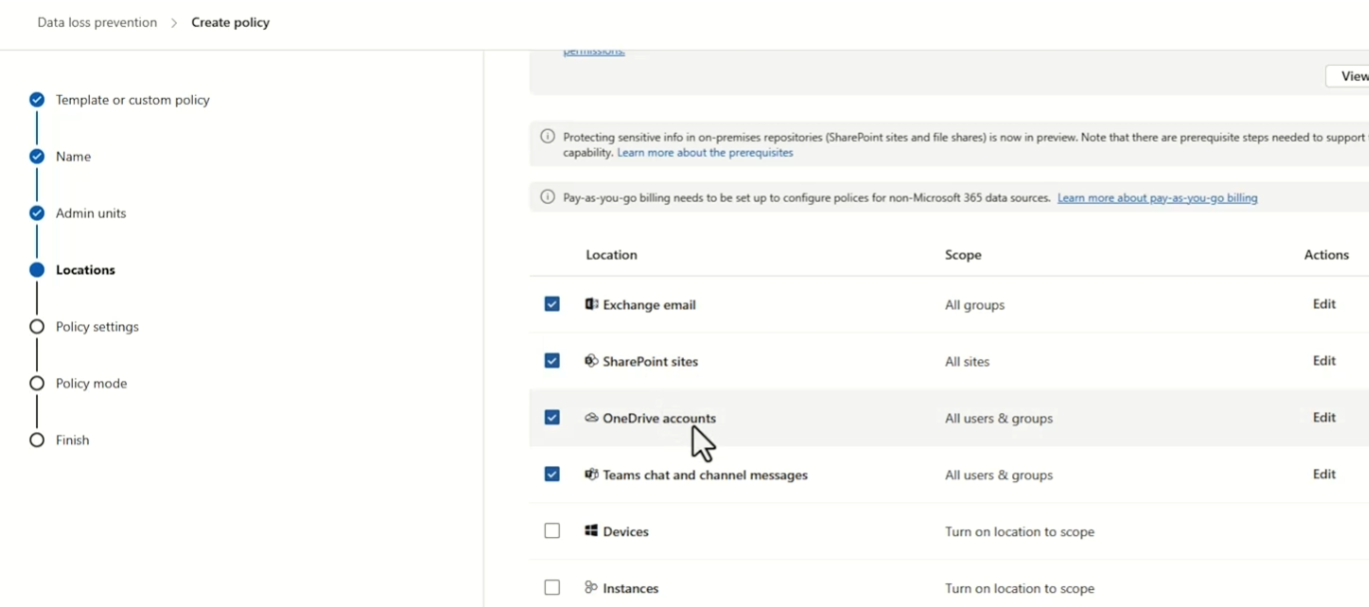
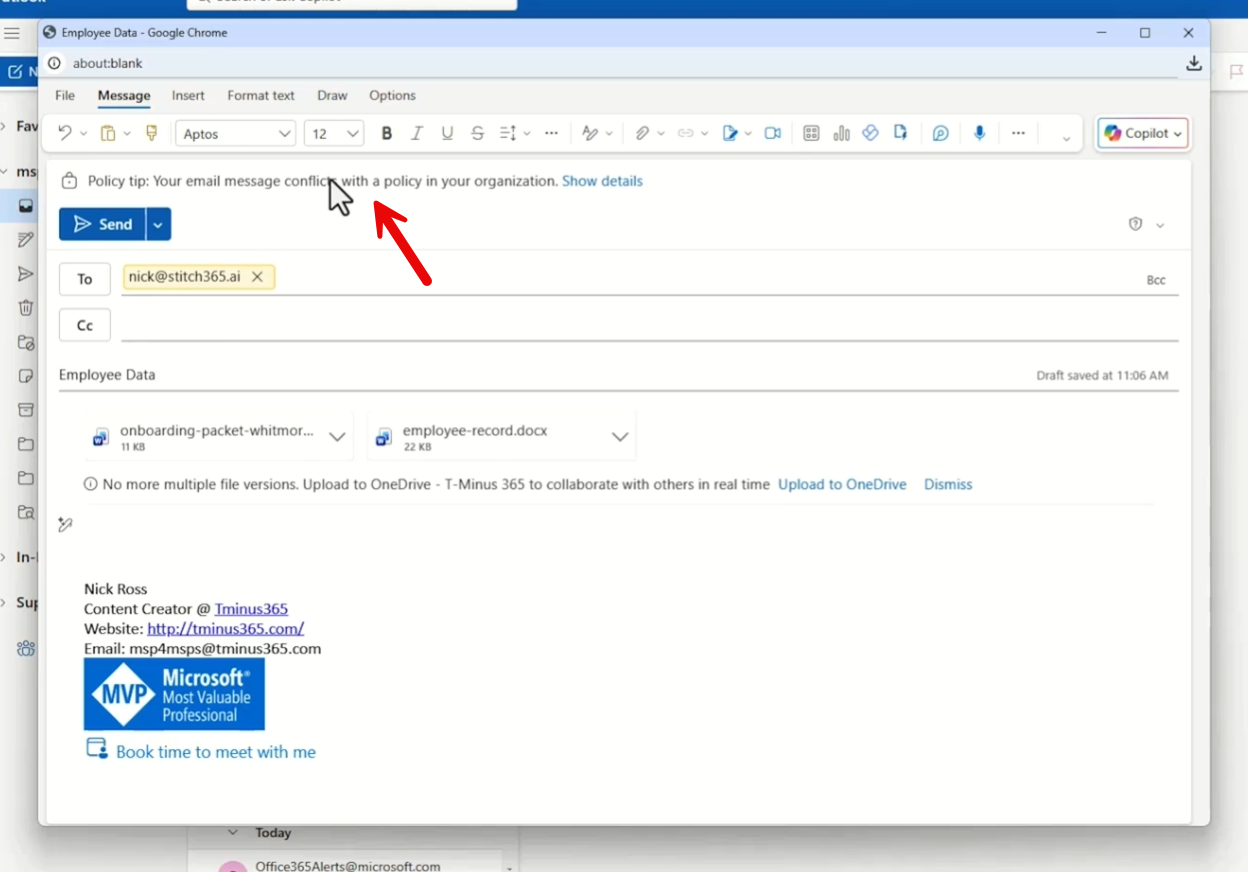
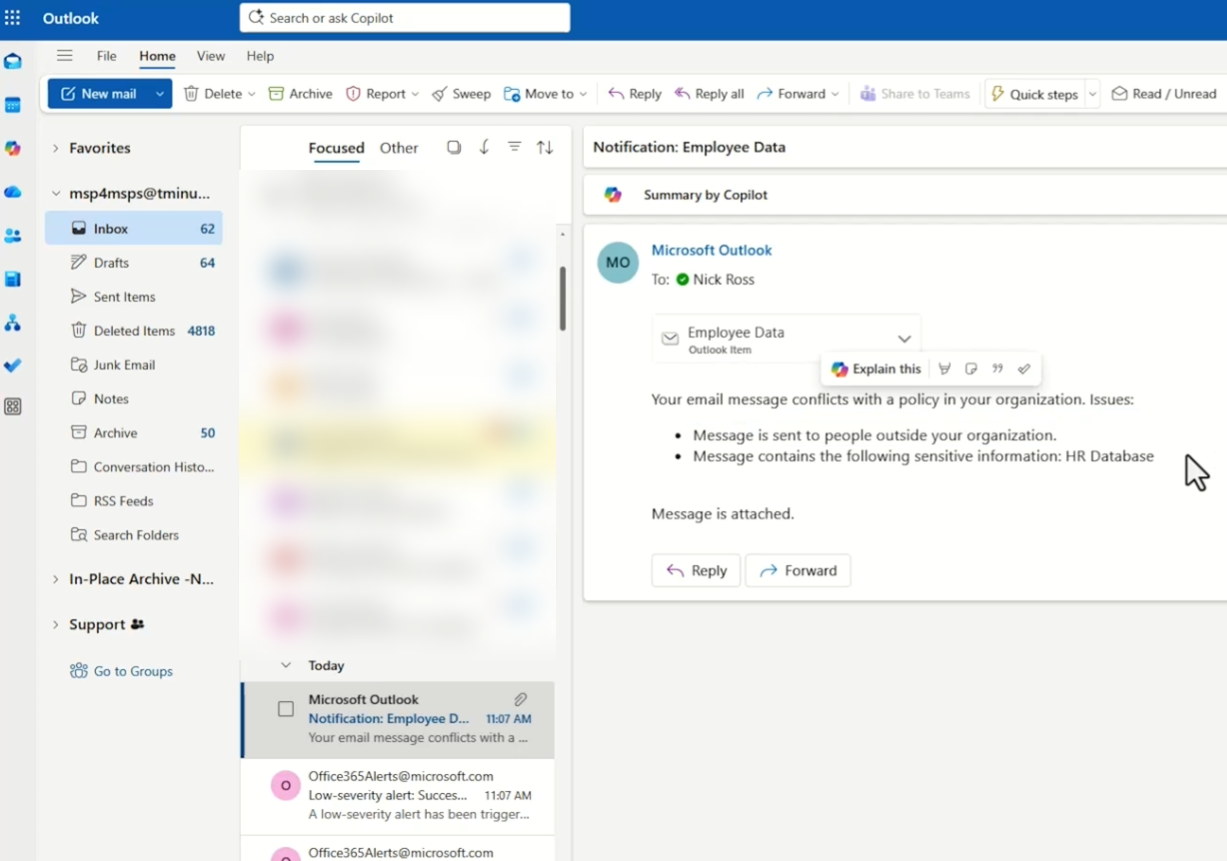
For actions, block external sharing, show a policy tip explaining why the content was blocked, and send incident alerts to your compliance team.
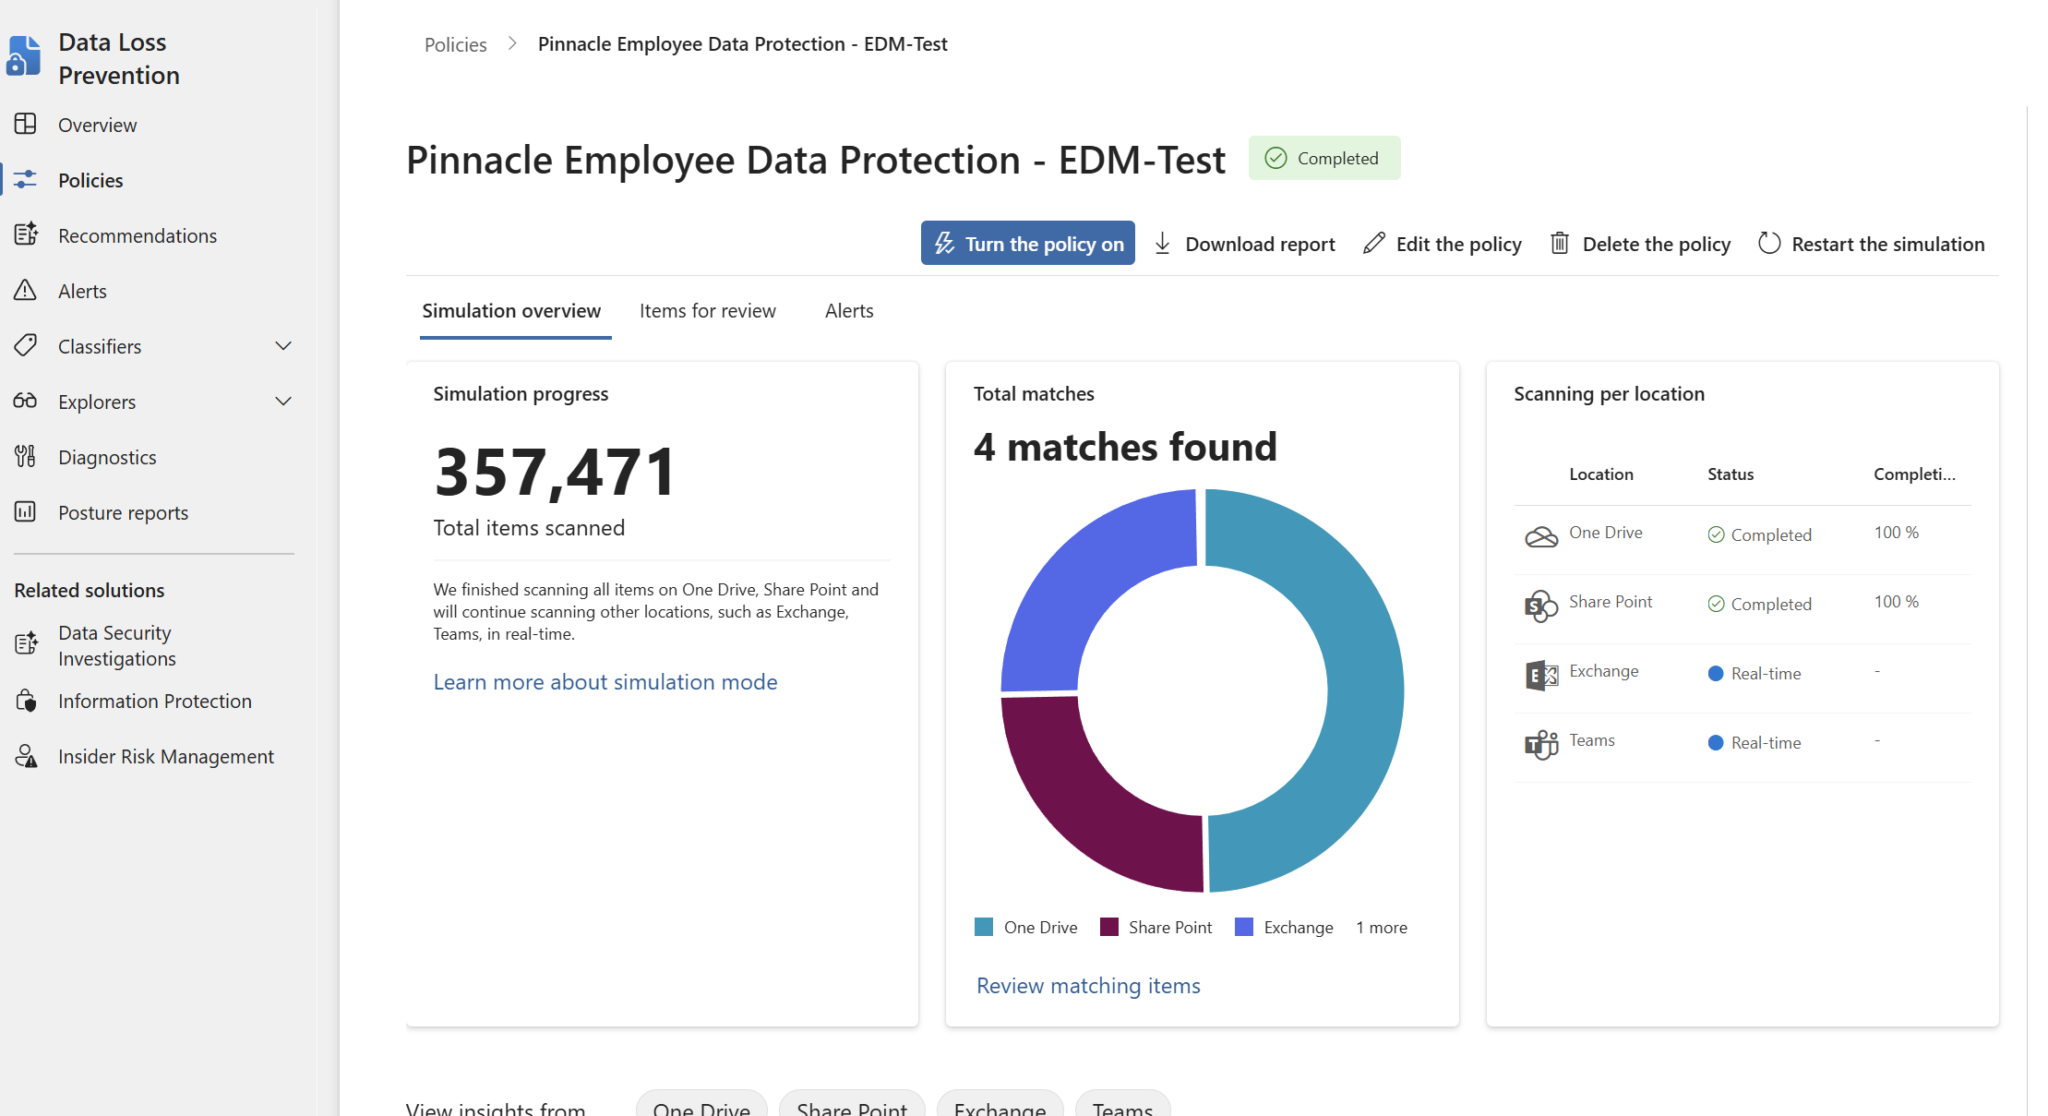
Start in simulation mode. Let it run for a week or two. Review what triggers. Then switch to enforced.
With EDM in place, here’s what happens:
An HR coordinator attaches an onboarding packet containing a real employee’s SSN, employee ID, and department to an email going to an external vendor. Blocked. Policy tip tells her why.
That same coordinator sends a quarterly budget spreadsheet that uses employee ID formats as project codes. Goes right through. EDM checked it against the database, found no matching record, and let it pass.
That’s the difference between pattern matching and exact data matching. One creates noise. The other creates protection.
EDM matches real data, not patterns. False positives drop to near zero because DLP is checking against your actual database, not guessing based on format.
Your data stays private. Everything is hashed locally. Microsoft never sees your sensitive records in plain text.
Start with simulation mode. Always. No exceptions. Test before you enforce.
Schedule regular uploads. Employees come and go. Your EDM database needs to stay current.
If you’ve been avoiding DLP because of false positives, EDM changes the equation. It’s worth the setup time.
8 min read
If you’ve ever set up a DLP policy in Microsoft 365, you’ve probably experienced the false positive problem. You create a rule to catch...
7 min read
Guest users are one of the most powerful collaboration features in Microsoft 365. They allow organizations to work with vendors,...

9 min read
Check out the latest updates on Microsoft 365 as CloudCapsule CEO & Microsoft MVP Nick Ross cuts through the noise and delivers the key...